
Blog
Expert Chimney Cowl Installation Guide UK (2026): Fit It Right First Time

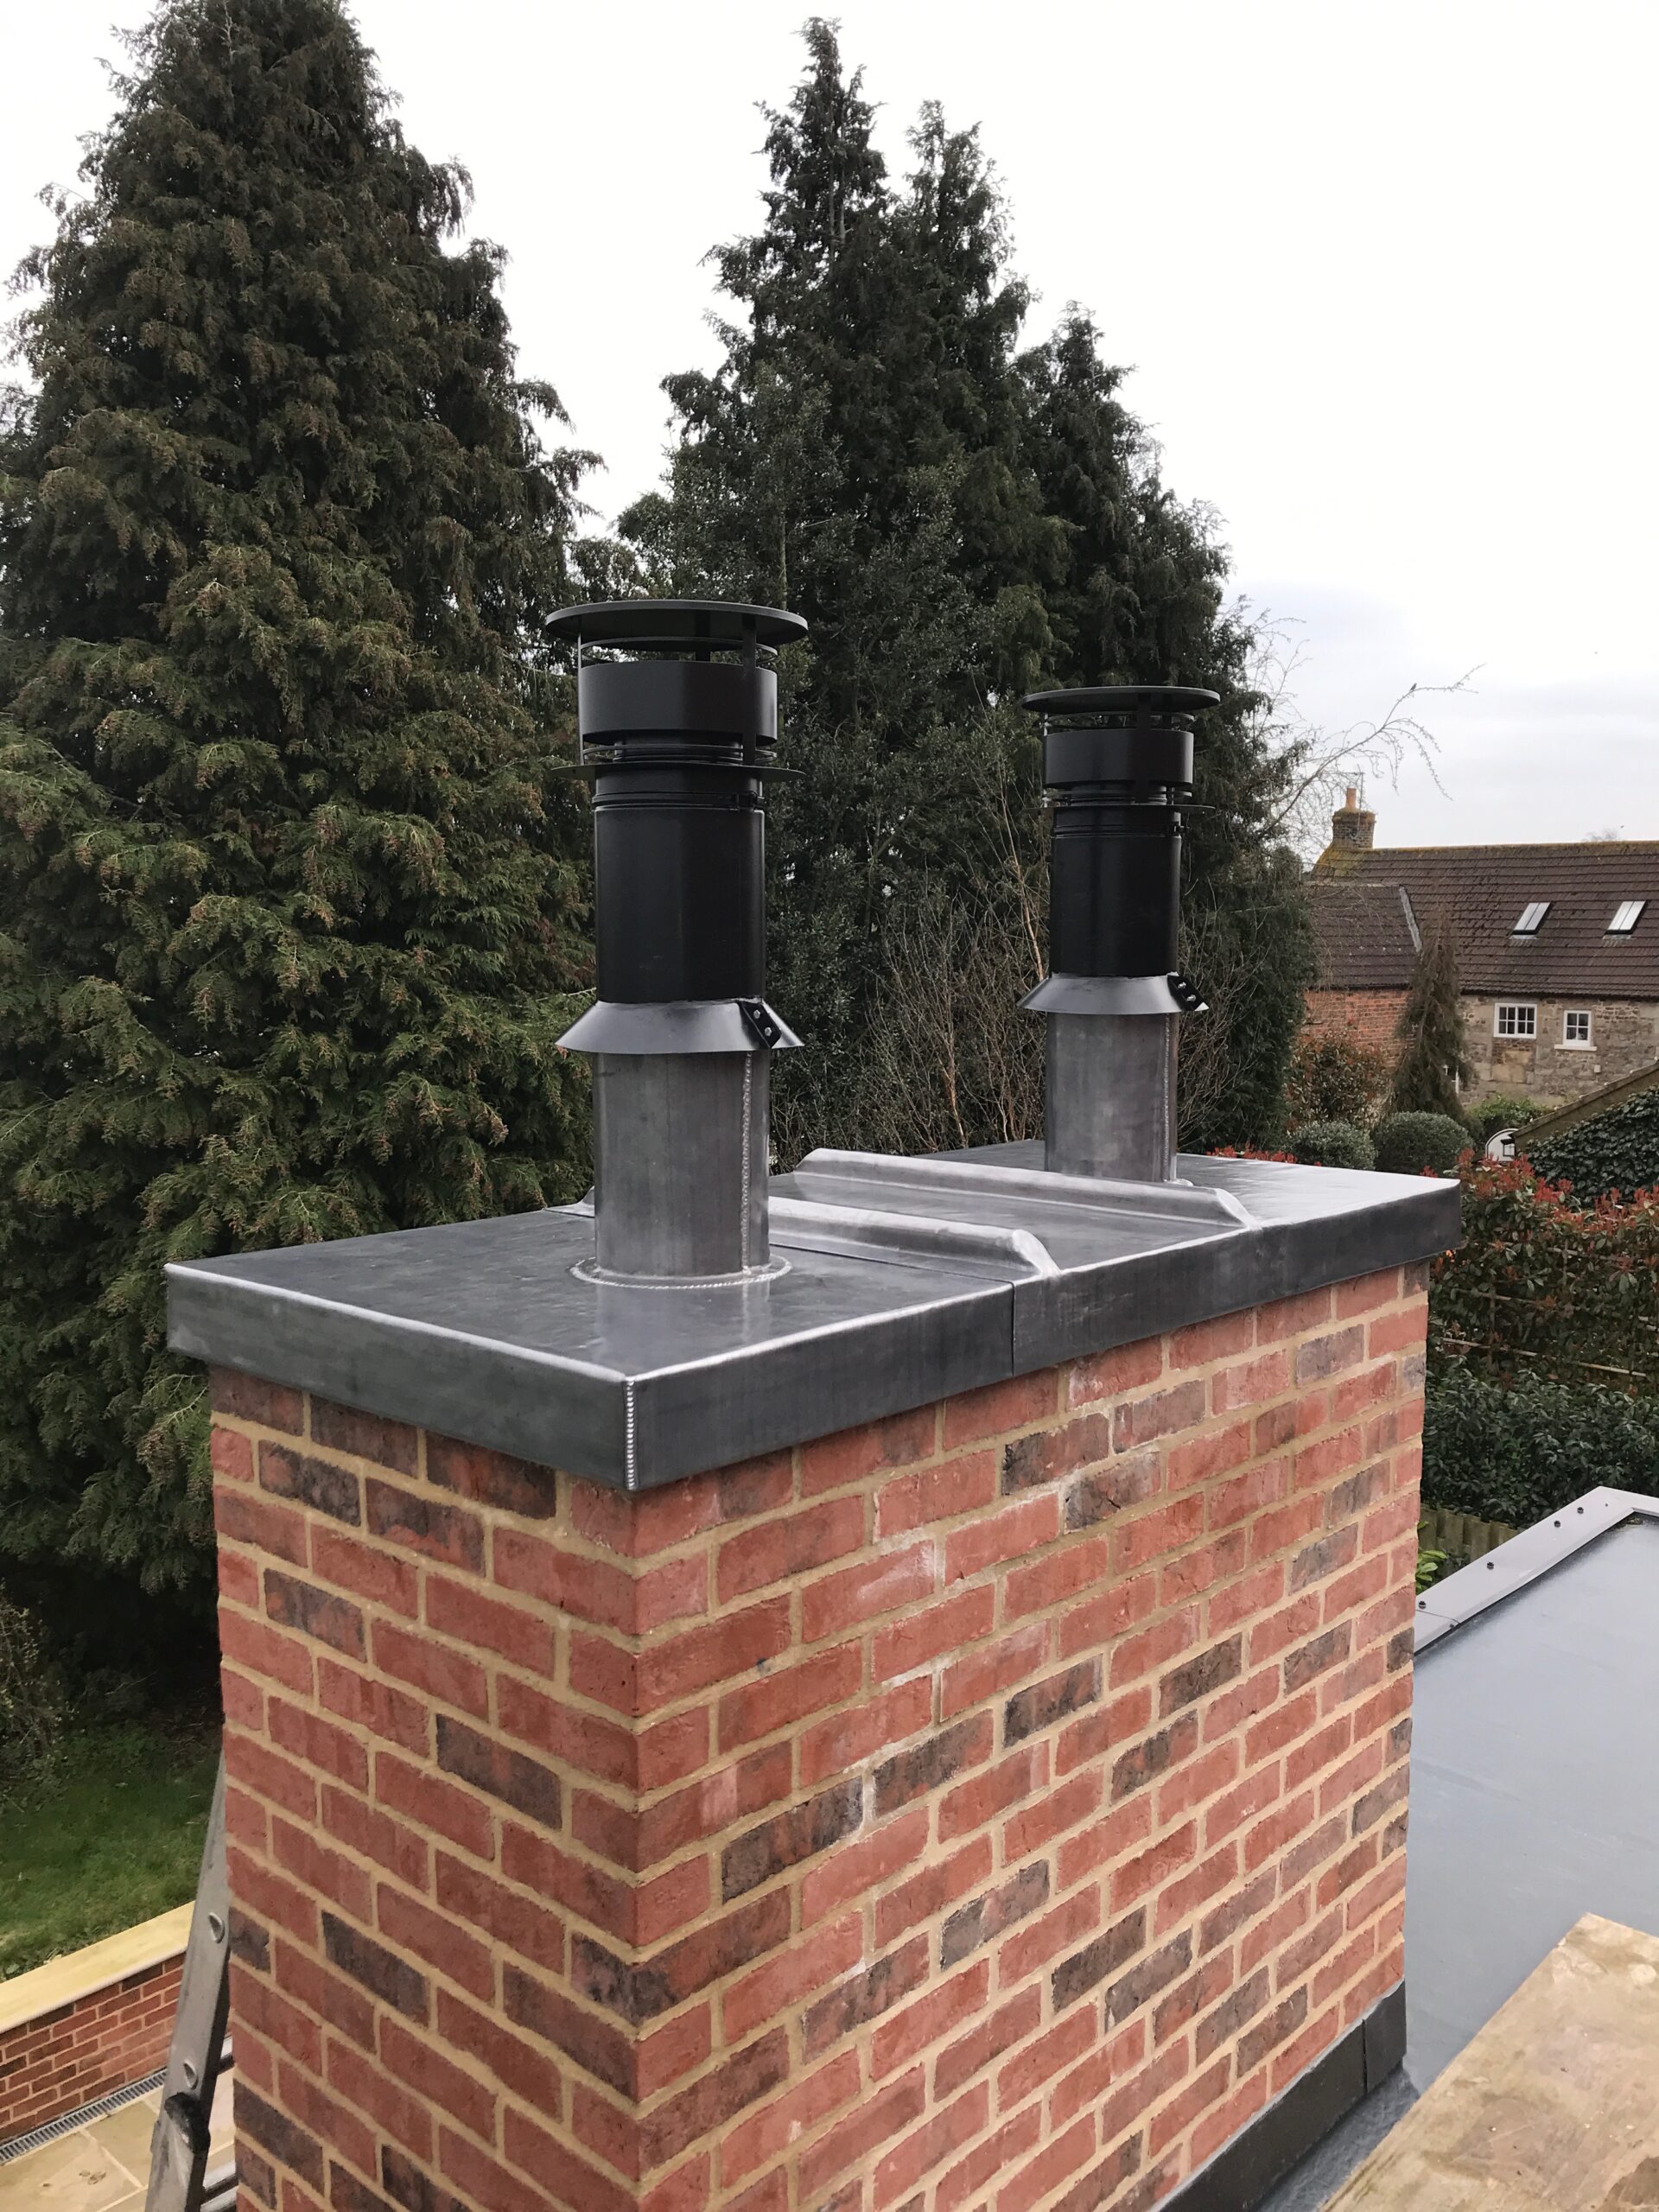
Chimney Cowl Installation Guide UK: How to Select, Measure and Fit a Cowl
This complete chimney cowl installation guide UK homeowners, chimney sweeps, roofers and stove installers can use explains how to diagnose the chimney problem, identify the appliance and fuel, take accurate chimney pot measurements, select the correct chimney cowl fixing and inspect the completed installation. Correct chimney cowl installation begins before anyone climbs onto the roof.
Important roof-access and combustion-safety warning
Chimney cowl installation involves roof work, exposed edges and combustion systems. A leaning ladder alone is not normally a suitable working platform. Access may require a secured roof ladder, scaffold, tower or mobile platform. Review the Health and Safety Executive guidance on safe roof work and use a competent professional wherever access, chimney condition or appliance compatibility is uncertain.
How do you fit a chimney cowl?
To fit a chimney cowl correctly, first identify the problem the cowl must solve and confirm that the selected terminal is compatible with the fuel, appliance and flue. Then follow this general chimney cowl installation sequence:
- Confirm the cowl model, fuel rating and fixing range.
- Plan suitable and safe access to the chimney.
- Measure the external pot, internal opening or liner diameter.
- Inspect the chimney pot, flaunching and surrounding stack.
- Prepare adjustable parts before taking the cowl onto the roof.
- Position the cowl centrally and squarely.
- Engage the manufacturer-specified mechanical fixing.
- Tighten clamps, straps or legs progressively and evenly.
- Confirm that the effective flue outlet remains clear.
- Check stability and complete any required appliance tests.
Manufacturer instructions always take priority over this general chimney cowl installation guide UK method.
Choose a Chimney Cowl by Problem, Fuel and Flue Type
The first stage of chimney cowl installation is not climbing onto the roof. It is identifying what the terminal needs to do and whether the chimney cowl is compatible with the connected system.
Professional tip: a chimney cowl should solve a diagnosed problem. A larger, more enclosed or more expensive terminal does not automatically improve draught, rain protection or flue safety.
Chimney Cowl Selection and Installation Diagnosis
A reliable chimney cowl installation follows a simple diagnostic sequence. Skipping one stage increases the chance of fitting a terminal that does not resolve the original problem.
If the symptom has not been diagnosed, replacing one chimney cowl with another is guesswork. Smoke blowback, water ingress and poor draught can originate below the terminal or within the surrounding chimney stack.
What Correct Chimney Cowl Installation Should Achieve
This chimney cowl installation guide UK standard treats the terminal, fixing, chimney pot, flue and appliance as one system. A professional installation is not simply a cowl placed over an opening.
Required installation outcomes
- The cowl suits the fuel and connected appliance.
- The fixing matches the pot, liner or flue system.
- The terminal addresses the diagnosed problem.
- The effective outlet remains sufficient.
- The cowl is stable in expected wind conditions.
- The installation remains inspectable and cleanable.
Failures a correct installation helps avoid
- Smoke blowback after fitting.
- Continuing rain penetration.
- Loose or rattling cowls after storms.
- Cracked clay pots caused by overtightening.
- Exposed or unsupported flexible liners.
- Repeated replacement of unsuitable terminals.
Installation standard: correct chimney cowl installation means the terminal is compatible, accurately sized, mechanically secure, correctly positioned, unrestricted and accessible for future sweeping and maintenance.
Checks Before Fitting a Chimney Cowl
Before chimney cowl installation begins, confirm the appliance, fuel, chimney construction, flue condition, chimney pot measurements and reason for fitting the terminal.
Identify the connected appliance
Confirm whether the chimney serves an open fire, wood-burning stove, multi-fuel stove, gas appliance, oil appliance or no active appliance.
Identify the chimney problem
Establish whether the concern is rain, birds, debris, smoke blowback, wind pressure, poor liner termination or ventilation of a redundant flue.
Arrange chimney sweeping
The chimney should normally be swept before a new terminal is fitted. Sweeping can expose soot, nesting material, debris and flue restrictions.
Inspect the chimney pot
Check for cracking, spalling, movement, weathering and unsuitable historic fixings. A defective pot should be repaired or replaced before supporting a cowl.
Inspect the chimney stack
Review flaunching, pointing, masonry and leadwork. Water entering through the stack cannot necessarily be corrected by fitting a rain cap.
Plan safe roof access
Consider roof pitch, height, fragility, weather, working space, dropped-object risk and how the chimney cowl will be moved to chimney level.
Routine sweeping and servicing can be arranged through The Stove Guys chimney and stove service network . Stove owners can also review Hot Box Stoves for appliance, flue and installation guidance.
How to Measure a Chimney Pot for Cowl Installation
Accurate chimney pot measurements are one of the most important stages in this chimney cowl installation guide UK. The required measurement depends on whether the cowl fixes outside the pot, inside the opening or directly to a flexible liner.
External chimney pot diameter
Measure across the external surface where the strap, band or external clamp will sit. Do not rely only on the decorative rim, which may be wider than the usable chimney cowl fixing area.
Internal chimney pot diameter
Measure the clear opening where an insert, spigot or internal clamp will engage. Check for tapering, deposits, irregular clay and reductions below the visible opening.
Round chimney pots
Measure the pot in at least two directions. Older chimney pots are not always perfectly circular.
Square chimney pots
Record the external width and depth. Also measure the clear internal opening and note the corner profile.
Tapered chimney pots
Record the dimension at the intended chimney cowl fixing position, not only at the rim or pot base.
Decorative chimney pots
Check mouldings, shoulders and restricted sections that may prevent a standard strap or clamp from seating evenly.
Flexible chimney liners
Confirm the nominal liner diameter, liner grade, connection method and whether the liner requires support at chimney level.
Factory-made flues
Identify the flue manufacturer and system designation. Do not select a generic chimney-pot terminal using diameter alone.
Professional tip: photograph the chimney pot with a tape measure in position. Record the external diameter, internal diameter, straight-sided fixing height, liner size and distance to neighbouring pots.
Common Chimney Pot and Flexible Liner Sizes
The table below is a general recognition guide. Chimney cowl installation must be based on actual measurements and the product manufacturer’s stated fixing range.
| Approximate size | Common description | Potential use | Installation check |
|---|---|---|---|
| 125 mm | Nominal 5-inch liner | Some approved stove and flue arrangements | Confirm appliance instructions and liner compatibility |
| 150 mm | Nominal 6-inch liner | Common solid-fuel flexible liner size | Confirm whether a pot hanger or top-plate system is required |
| 175–200 mm | Smaller clay pot range | Some open fires, stoves and redundant flues | Measure the actual chimney cowl fixing position |
| 200–250 mm | Medium clay pot range | Common domestic chimney-pot applications | Check the internal opening and decorative rim |
| 250 mm+ | Large or oversized pot | Larger open fireplaces and historic chimneys | Confirm whether the fixing spans the pot securely |
| Square or rectangular | Non-circular chimney pot | Traditional and decorative chimney arrangements | Record the width, depth and corner form |
These are not universal product-selection dimensions. A nominal flue size, internal pot opening and external pot diameter are different measurements and should not be substituted for one another.
Chimney Cowl Fixing Methods Explained
The chimney cowl fixing must match the terminal, chimney pot, liner and exposure. Sealant, adhesive or fire cement should never replace the designed mechanical restraint.
| Fixing method | Typical application | Main advantage | Critical installation check |
|---|---|---|---|
| Strap or band fixing | Sound round clay chimney pots | Adjustable and widely used | The band must engage a sound straight-sided section |
| External clamp or leg fixing | Pot-mounted chimney cowls | Adaptable to several pot sizes | Tighten each fixing progressively and evenly |
| Internal clamp | Compatible circular chimney-pot openings | Minimal visible fixing | Check clear internal diameter and insertion depth |
| Insert or spigot | Purpose-made pot or sleeve connection | Compact and positive engagement | The spigot diameter and depth must match the opening |
| Pot-hanger liner cowl | Flexible metal chimney liners | Can support and terminate the liner | Confirm liner diameter, pot size and product load capacity |
| Top plate and sleeve | Flexible liner systems | Supports and protects the liner termination | Use compatible system components |
| Proprietary flue terminal | Twin-wall and factory-made systems | Maintains system compatibility | Use the approved terminal for that manufacturer |
Professional tip: when several bolts or legs secure the cowl, alternate between them. Fully tightening one chimney cowl fixing first can pull the terminal off centre and concentrate pressure against the clay pot.
How to Fit a Chimney Cowl: Step-by-Step Installation Method
Product-specific instructions always take priority. The following chimney cowl installation sequence explains the general principles for fitting a mechanically secured domestic cowl.
Confirm the chimney cowl specification
Check the product model, fuel rating, fixing type, permitted chimney-pot sizes, liner compatibility and any required support or top-plate components.
Confirm safe access and weather conditions
Do not begin roof work in unsuitable wind, rain, frost or poor visibility. Establish a safe working position and control tools, fixings and loose components.
Measure the chimney pot or liner
Recheck the relevant external diameter, internal diameter, fixing height, liner size and distance to nearby terminals before fitting the cowl.
Inspect the pot, flaunching and stack
Check for cracking, loose masonry, weak flaunching, damaged pointing, unstable pots and defective leadwork. Correct significant defects before chimney cowl installation.
Prepare the chimney cowl at ground level
Assemble adjustable parts, check the orientation and set the fixing approximately to size before moving the cowl onto the roof.
Position the chimney cowl centrally
Place the cowl squarely on or within the pot, sleeve or liner connection. Check that it sits level and does not obstruct a neighbouring terminal.
Engage the mechanical fixing
Fit the band, clamps, legs, bolts, spigot or liner connector specified by the manufacturer. Do not depend on adhesive, sealant or fire cement as the primary chimney cowl fixing.
Tighten progressively and evenly
Alternate between multiple fixings. Stop when the terminal is secure against lifting, twisting and movement without cracking the pot or distorting the cowl.
Check the effective flue outlet
Confirm that combustion gases have a clear discharge path. Check canopy clearance, mesh, internal baffles and rotating parts where fitted.
Complete a controlled stability check
Apply light hand pressure. The chimney cowl should not rock, lift, twist, rattle or slide on the pot.
Record the completed installation
Photograph the chimney cowl, fixing, chimney pot and surrounding stack. Retain the product details for future inspection and replacement.
Complete required flue or appliance checks
Where relevant, arrange smoke testing, appliance commissioning, draught checks or registered-engineer inspection before normal use resumes.
Correct and Incorrect Chimney Cowl Installation
Use these practical checks to distinguish a secure and serviceable chimney cowl fitting from one that requires further attention.
- The chimney cowl is centred and level.
- The fixing engages sound material.
- Bolts or legs are tightened evenly.
- The pot remains free from new cracking.
- The flue outlet and canopy gap remain clear.
- The terminal does not obstruct nearby pots.
- Future sweeping and inspection remain possible.
- The chimney cowl leans or sits off centre.
- A clamp bears against a cracked or tapered section.
- One fixing is fully tightened before the others.
- Sealant is being used as the main restraint.
- Mesh or a low canopy restricts the outlet.
- The terminal rattles, rotates or lifts by hand.
- The flexible liner is unsupported or exposed.
A cowl that appears secure from ground level can still be incorrectly fitted. Close inspection should confirm the chimney cowl fixing position, pot condition, terminal clearance and effective discharge area.
Effective Outlet Area After Chimney Cowl Installation
Free exit area is the effective open space through which smoke and combustion gases leave the terminal. Chimney cowl installation must not create unnecessary resistance within the flue.
Why outlet area matters
A restrictive chimney cowl can weaken draught and contribute to slow smoke clearance, unstable combustion, smoke spillage and increased soot deposition.
The objective is to provide rain, bird or wind protection without unreasonably narrowing the discharge route.
What the installer should inspect
- Clearance beneath a rain-cap canopy.
- Open area through bird-guard mesh.
- Internal wind-deflection plates.
- The transition between liner and cowl.
- Compatibility with the flue diameter.
- Access for soot and debris removal.
Do not assess airflow from the external cowl diameter alone. Mesh, canopy clearance, internal plates, reductions and connection details all affect the effective outlet area.
Chimney Cowl Installation by Chimney and Flue Type
The correct installation detail changes according to whether the cowl is fixed to a traditional clay pot, flexible liner, masonry opening or proprietary manufactured flue.
Clay chimney pot
Strap, band, external clamp and some insert-fixed chimney cowls are commonly used on sound clay pots. The pot and flaunching must be stable.
Flexible chimney liner
Liner cowl installation forms part of the support and weathering arrangement. Use a compatible liner cowl, pot hanger, top plate or sleeve.
Open masonry flue
A plate, adapter, pot or purpose-made terminal may be required. Avoid fixing a domestic pot cowl directly to weak masonry.
Twin-wall flue system
Factory-made insulated flues normally require the terminal approved by the flue-system manufacturer.
For full stove, liner and flue-system work in England, review Hot Box Stoves . For stove and chimney services in Scotland, see wood-stove services in Scotland .
Common Chimney Cowl Designs and Installation Uses
Product names and designs vary between manufacturers. A chimney cowl should be chosen by function, fuel compatibility, flue arrangement and product information rather than appearance alone.
Rain-cap chimney cowl
A canopy helps reduce direct rainfall through the chimney pot. It may not resolve water entering through the stack, flashing or flaunching.
Bird-guard chimney cowl
Mesh can reduce bird and debris entry. The aperture and open area must remain suitable for the fuel and flue.
Anti-downdraught cowl
Directional, aerodynamic and pressure-balancing cowls can reduce adverse wind effects where wind is the diagnosed cause.
Rotating chimney cowl
Rotating designs rely on free movement. Bearings and rotating parts require inspection, cleaning and exposure-appropriate materials.
Pot-hanger liner cowl
A pot-hanger arrangement can support and terminate a flexible liner where the chimney pot and liner sizes are compatible.
Ventilating chimney cap
Redundant chimneys often require continued airflow. A ventilating cap should not normally be used on an active solid-fuel flue.
Wind, Roof Turbulence and Chimney Cowl Installation
Wind creates changing pressure zones around ridges, parapets, extensions, dormers, trees and neighbouring buildings. Both the chimney cowl design and fixing method should suit the location.
Urban and suburban roofs
Nearby buildings and altered rooflines can create directional turbulence. Smoke problems may appear only when the wind approaches from a particular direction.
Open rural locations
Exposed properties can impose greater wind loading on the chimney cowl, chimney pot and fixing arrangement.
Coastal locations
Salt-laden air can accelerate corrosion. Stainless-steel chimney cowls and compatible corrosion-resistant fixings are often preferable.
Nearby trees and obstructions
Trees can create turbulence, leaf accumulation, twigs and increased nesting activity around the chimney.
Chimney cowl installation cannot reliably correct smoke blowback until blockages, room depressurisation, inadequate combustion air, extract fans and poor chimney height have also been considered.
UK Guidance Relevant to Chimney Cowl Installation
Chimney cowl installation should be considered alongside the connected appliance, flue system, combustion-air supply and safe discharge of combustion products.
Building Regulations guidance
Combustion appliances and flues fall within wider requirements for safe installation, air supply and discharge. Review the current guidance applicable to the property and appliance.
Manufacturer instructions
The chimney cowl, appliance, liner and factory-made flue instructions should be treated as essential installation information.
Competent-person requirements
Gas, oil and some solid-fuel work may require registered or otherwise suitably qualified installers and appropriate testing.
For general UK combustion-appliance guidance, consult the current edition of Approved Document J . Gas-appliance work should be referred to a suitably qualified Gas Safe registered engineer .
This chimney cowl installation guide UK page provides general educational guidance. It does not replace manufacturer instructions, system certification, site assessment or competent-person testing.
Common Chimney Cowl Installation Mistakes
Most chimney cowl failures can be traced to incorrect product selection, poor measurements, an unsuitable chimney pot, inadequate diagnosis or weak mechanical fixing.
Choosing a cowl by appearance
Shape, colour and finish do not establish compatibility with the connected fuel, appliance or flue.
Guessing the chimney-pot size
A near-looking diameter may not engage securely and could restrict the chimney opening.
Fitting to a cracked chimney pot
A secure cowl fixed to a weak, weathered or moving pot remains an unsafe installation.
Overtightening chimney cowl clamps
Excess force can crack clay, distort the terminal and create uneven loading.
Relying on sealant
Sealant, adhesive and fire cement should not replace the specified chimney cowl fixing.
Restricting the flue outlet
Small canopy gaps, blocked mesh and unsuitable internal plates can weaken chimney performance.
Using the wrong fuel rating
A gas terminal, ventilating cap or decorative product may be unsuitable for an active solid-fuel flue.
Ignoring the chimney stack
Water may enter through pointing, flaunching, masonry or leadwork rather than through the chimney-pot opening.
Assuming every smoke problem is wind
Blockages, cold flues, extract fans, inadequate ventilation and poor chimney height can cause similar symptoms.
Where the problem involves damaged masonry, flaunching, pointing or leadwork, review professional chimney stack repair services . Further guidance is also available from Hot Box chimney repair .
Chimney Cowl Installation Troubleshooting Flow
Follow the most relevant symptom before ordering another chimney cowl. A replacement terminal will only help where the existing cowl is unsuitable, damaged, obstructed or incorrectly fitted.
| Symptom | Possible cause | Recommended response |
|---|---|---|
| Smoke enters the room | Restrictive cowl, blockage, cold flue, extractor fan, weak ventilation or incorrect terminal | Stop use where unsafe and assess the complete appliance and flue |
| Chimney cowl rattles in wind | Loose clamp, poor fit, damaged pot or worn rotating component | Arrange close inspection and correct or replace the fixing |
| Water still enters | Wrong cowl, rain bypass, condensation, defective masonry, flaunching or flashing | Identify the actual water-entry route before replacing the cowl |
| Birds or debris still enter | Damaged mesh, unsuitable aperture or another open flue | Identify the entry point and select a compatible bird guard |
| Rust or staining develops | Corrosion, condensate, incompatible materials or poor-quality fixings | Review the chimney cowl material, fixing and exposure conditions |
| Flexible liner remains exposed | Missing support, sleeve, top plate or suitable liner cowl | Install a compatible liner-support and termination system |
Typical Chimney Cowl Installation Failures and Remedies
These examples demonstrate why chimney cowl installation should follow diagnosis, measurement and inspection rather than product selection by appearance.
Loose chimney cowl after a storm
A strap-fixed cowl begins moving after high winds. Likely causes include uneven tightening, an unsuitable clamping position, poor seating or an undersized fixing range.
Remedy: remove the cowl, inspect the chimney pot, confirm the fixing range and reseat the terminal before tightening progressively.
Smoke spillage after cowl installation
A stove begins spilling smoke after a restrictive cap is installed. The terminal may have reduced the effective outlet area or introduced unsuitable baffles.
Remedy: assess the complete appliance and flue, then replace the terminal with a compatible design where the cowl is the confirmed cause.
Rain continues to enter the chimney
A bird guard has been fitted but water ingress remains. The product may provide bird protection without substantial rain protection, or the chimney stack may be defective.
Remedy: inspect flaunching, pointing, masonry and leadwork before replacing the terminal.
Poor liner cowl installation
A flexible liner is left unsupported or exposed at chimney level. Water entry, movement and premature liner deterioration can follow.
Remedy: install a compatible pot hanger, top plate, sleeve, clamp and liner cowl arrangement as required.
Chimney Cowl Materials, Finish and Expected Service Life
Service life depends on material thickness, manufacturing quality, condensate, fuel, exposure, maintenance and proximity to the coast. The descriptions below are general rather than guarantees.
| Material or finish | General durability | Suitable context | Maintenance consideration |
|---|---|---|---|
| Galvanised steel | Moderate | General domestic applications away from severe exposure | Inspect coating breakdown and rust |
| Stainless steel | High | Solid-fuel, exposed and coastal applications where specified | Check joints, mesh and fixings |
| Powder-coated metal | Varies with substrate and coating | Decorative and general domestic installations | Inspect chips, scratches and edge corrosion |
| Copper | High | Premium and heritage-sensitive applications | Expect natural patination and check incompatible metals |
| Clay terminal | High where sound and compatible | Traditional and heritage chimney arrangements | Inspect frost damage, cracking and mortar joints |
Read the chimney cowl materials and finishes guide before selecting a terminal for coastal, rural or highly exposed properties.
Chimney Cowl Inspection and Maintenance After Installation
Chimney cowl installation is not the end of the process. The terminal remains exposed to wind, rain, frost, heat, soot, condensate, birds and corrosion throughout its service life.
| Season or event | Common issue | Recommended check |
|---|---|---|
| After severe storms | Movement, loose straps or damaged rotating parts | Inspect the cowl, chimney pot and fixing at close range |
| Winter | Strong wind, frost, cold flues and condensation | Check security and ensure the terminal remains clear |
| Spring | Bird nesting activity | Check for nesting signs, damaged mesh and obstruction |
| Summer | Low use, stale smells and reverse airflow | Maintain suitable ventilation and investigate downdraught |
| Autumn | Leaves, rain, soot and loose debris | Arrange sweeping and inspect mesh and moving parts |
| During routine sweeping | Soot accumulation and inaccessible terminal parts | Ask the chimney sweep to report visible cowl defects |
Professional tip: retain the chimney cowl model, purchase record, fitting instructions and completion photographs. These make future maintenance and replacement substantially easier.
When Chimney Cowl Installation Requires a Professional
Professional chimney cowl installation is recommended wherever access, chimney condition, appliance compatibility, flue performance or the cause of the problem is uncertain.
Use a professional where:
- The chimney serves a gas or oil appliance.
- The roof is steep, high, fragile or difficult to access.
- The chimney pot is cracked, loose or irregular.
- A flexible liner requires support and termination.
- Smoke blowback has not been diagnosed.
- Scaffold or specialist access is required.
- The chimney stack requires masonry or leadwork repair.
- The property is listed or historically significant.
Which professional may be suitable?
Depending on the appliance and chimney, the work may involve a chimney sweep, stove installer, roofing contractor, chimney specialist, Gas Safe engineer or oil-heating engineer.
The contractor should understand the complete appliance, flue, chimney cowl and chimney-stack arrangement. Reaching the pot is not enough on its own.
Who Fits Chimney Cowls?Gas terminals are appliance-specific safety components. Specification, fitting and subsequent appliance checks should be undertaken by a suitably qualified Gas Safe registered engineer.
Final Chimney Cowl Installation Checklist
Complete these checks before the chimney or connected appliance is returned to normal use.
Selection and chimney cowl fixing
- The chimney cowl suits the fuel and connected appliance.
- The design addresses the diagnosed problem.
- The fixing matches the pot, liner or flue system.
- The chimney pot is sound and stable.
- The terminal is centred and level.
- Fixings are secure and evenly tightened.
- No new cracking or distortion is visible.
Performance and future maintenance
- The effective flue outlet remains clear.
- Mesh and canopy openings can be cleaned.
- Rotating parts move freely where applicable.
- Nearby chimney pots remain unobstructed.
- The finished installation has been photographed.
- Future sweeping and inspection remain possible.
- Required appliance checks have been completed.
Professional sign-off standard: the chimney cowl is compatible, mechanically secure, correctly positioned, adequately ventilated, stable under expected exposure and accessible for future maintenance.
Best Practice for Chimney Cowl Installation
Every chimney cowl installation should begin with understanding why the cowl is being fitted. A successful installation solves the original problem without introducing restricted draught, poor combustion, accelerated corrosion or unnecessary maintenance.
Establish whether the issue is rain, birds, downdraught, debris, ventilation or liner termination.
Confirm compatibility with the appliance, fuel, flue and chimney construction.
Record the relevant pot, liner and fixing dimensions rather than relying on estimates.
Use the designed mechanical chimney cowl fixing and tighten it progressively.
Keep the terminal accessible for sweeping, cleaning, inspection and eventual replacement.
Planning chimney cowl installation
Before beginning chimney cowl installation, confirm the appliance type, fuel, chimney construction, flue diameter, chimney-pot measurements and exposure. Correct diagnosis and measurement are more important than simply choosing the largest or most expensive terminal.
Professional chimney cowl fitting also considers future servicing. The terminal should remain accessible for chimney sweeping, inspection and routine maintenance throughout its service life.
Checking completed chimney cowl installation
Once chimney cowl installation is complete, inspect the mechanical fixing, confirm that the terminal remains stable under controlled hand pressure and ensure that the effective flue outlet remains unobstructed.
If smoke problems, rain ingress or bird activity continue, further investigation of the chimney construction, flue condition, room air supply or surrounding environment may be required.
Best-practice summary: a high-quality chimney cowl installation is based on accurate diagnosis, correct product selection, reliable chimney pot measurements, safe access, secure mechanical fixing, adequate outlet area and ongoing maintenance.
Related Chimney Cowl Guides and Products
Use these resources to select the correct terminal and fixing before chimney cowl installation begins.
About This Chimney Cowl Installation Guide UK
This chimney cowl installation guide UK has been prepared by Chimney Cowls UK to help homeowners, installers and property professionals understand cowl selection, chimney pot measurements, chimney cowl fixing arrangements, installation defects and maintenance.
The guidance is informed by practical chimney, roofing, stove and flue-system experience. Product instructions and site-specific professional advice always take priority.
The page is periodically reviewed to reflect new products, recurring customer questions and practical chimney cowl installation issues.
Chimney Cowl Installation Guide UK FAQs
These answers cover common chimney cowl installation, fixing, measurement, liner termination and maintenance questions.
Can I install a chimney cowl myself?
A competent person may be able to fit a straightforward chimney cowl where the product, appliance compatibility and fixing method are known and genuinely safe roof access is available. Difficult roofs, defective chimney pots, flexible liners and uncertain flue performance should be handled professionally.
What is the best chimney cowl fixing method?
There is no single best chimney cowl fixing for every installation. Sound clay pots commonly use strap or clamp fixings. Flexible liners normally require compatible support and termination components. Factory-made flues generally require the system manufacturer’s terminal.
How do I measure a chimney pot for a cowl?
Measure the external diameter for strap or external-clamp cowls, the internal diameter for insert fittings and the nominal liner diameter for liner cowls. Also record the available fixing height, chimney-pot shape and distance to neighbouring terminals.
How tight should a chimney cowl clamp be?
The clamp should prevent lifting, twisting and movement without cracking the chimney pot or distorting the cowl. Tighten multiple fixings progressively and alternately.
Should sealant or fire cement secure a chimney cowl?
No. Sealant, adhesive or fire cement should not replace the specified mechanical chimney cowl fixing. Only use jointing materials where the product or flue-system manufacturer specifically requires them.
Can a badly installed chimney cowl cause smoke problems?
Yes. A restrictive, undersized or incorrectly assembled terminal can weaken draught and contribute to smoke spillage. Blockages, extract fans, cold flues and inadequate combustion air should also be investigated.
Why does rain still enter after chimney cowl installation?
The selected chimney cowl may provide little rain protection, wind may carry rain beneath the canopy, or water may be entering through defective flaunching, pointing, masonry or lead flashing.
Which chimney cowl is suitable for a flexible liner?
Use a terminal designed for the liner diameter and installation system. Liner cowl installation may require a pot-hanger cowl, support clamp, top plate, top sleeve or other compatible components.
Does the chimney need sweeping before a cowl is fitted?
The chimney should normally be swept and inspected first, particularly where it has been unused, affected by birds or connected to a solid-fuel appliance.
Can a chimney cowl improve draught?
Some chimney cowls can stabilise airflow or reduce adverse wind pressure. They cannot correct every chimney defect, and an unsuitable cowl can make performance worse.
How often should a chimney cowl be inspected?
Inspect the chimney cowl during routine chimney maintenance and after severe storms. Mesh, rotating parts, straps, clamps and exposed fixings may require more frequent attention in heavily exposed locations.
Do I need planning permission for chimney cowl installation?
Routine work may not require planning permission, but additional controls can apply to listed buildings, conservation areas, leasehold properties, Article 4 directions and buildings subject to specific planning conditions.
Choose the Correct Cowl Before Installation
Match the chimney cowl to the appliance, fuel, chimney type, measurements, exposure and problem you need to solve. Use the guided Cowl Finder or browse the complete UK chimney cowl range.


