Blog
Chimney Cowl Safety Checklist (UK): Pre-Install, Install & Ongoing Maintenance


Chimney Cowl Safety Checklist (UK): Pre-Install, Install & Ongoing Maintenance
Chimney Cowl Safety Checklist is a structured, HSE-aligned pathway to plan access, select the right terminal, and complete an installation that protects people, property, and performance. This guide links each decision to the correct product and safe working method, so purchases on ChimneyCowls.uk translate into reliable, long-term results.
This safety-first checklist turns a risky roof task into a controlled process. Use the Chimney Cowl Safety Checklist before every job to standardise decisions.
Shopping? Jump to Shop or compare anti-downdraught, rain cap, bird guard, spark arrestor, and liner pot-hanger.
In this guide
- Chimney Cowl Safety Checklist: Why a Checklist Beats Guesswork
- Chimney Cowl Safety Checklist: Access Planning & Risk Controls
- Product Selection That Solves the Real Problem
- Measurements & Compatibility
- Tools, Fixings & PPE
- Step-By-Step Install Sequence
- Maintenance Intervals & Logbook
- Common Mistakes & How to Avoid Them
- When to Call a Professional
- Legal Duties, Roles & Documentation
- Public Interface, Traffic & Permits
- Competence, Training & Supervision
- Specifying Access in Quotes & RAMS
- Troubleshooting After Install
- Seasonal Preparation & Storm Response
- Chimney Cowl Safety Checklist: Quick-Reference Prompts
- Mini Case Studies (What Good Looks Like)
- FAQs
- Downloadable PDF
Use the Chimney Cowl Safety Checklist to decide access, confirm measurements, and avoid rework.
Chimney Cowl Safety Checklist: Why a Checklist Beats Guesswork
Accidents at height often begin with small assumptions: “the ladder will be fine,” “the pot looks sound,” or “the wind will drop.” A Chimney Cowl Safety Checklist makes risks visible, gives your team a shared script, and prevents scope creep. It builds trust with clients and ensures each installation on ChimneyCowls.uk products is demonstrably safe and effective.
- Aligns with HSE working at height principles and proportionate RAMS.
- Turns vague problems (blow-back, rain, wildlife, sparks) into precise product choices.
- Provides repeatable steps from pre-site planning to maintenance logbooks.
When shared with clients, the Chimney Cowl Safety Checklist reassures and reduces disputes.
Chimney Cowl Safety Checklist: Access Planning & Risk Controls
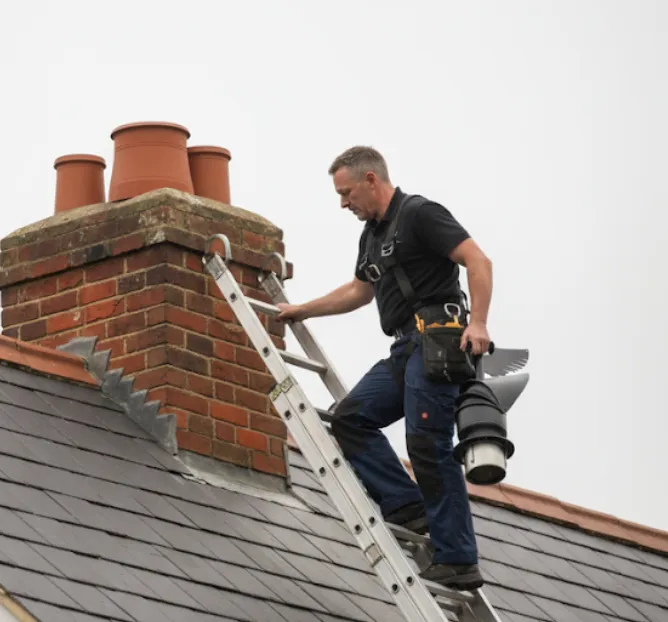
Good access choices reduce falls, dropped-object incidents, and time on the roof. Start with: roof material and pitch; stack location (eaves, ridge, gable); what lies beneath (conservatory, glass, public footpath); and weather for wind, ice, or storms.
Access decision prompts
- Ladders for short-duration, low-risk tasks on sound ground with tie-off points and three points of contact.
- Scaffolds when you need a stable platform, toe-boards, and public protection in busy areas.
- MEWPs over fragile roofs or where speed and flexibility across elevations matters.
Controls to apply
- Exclusion zones beneath work areas; signage and barriers on public footways.
- Tethered tools, toe-boards/brickguards, and controlled material staging.
- Weather go/no-go rules; lightning and high-wind cancellations.
See HSE overviews for context: Work at Height and MEWPs. Record access choices in RAMS with photos, as the Chimney Cowl Safety Checklist recommends.
Product Selection That Solves the Real Problem
Buying any cowl won’t help if it doesn’t address the cause. Map common symptoms to the right terminal so your purchase works first time. The Chimney Cowl Safety Checklist keeps selection on-track and documented.
Match problem to product
- Wind blow-back: choose an anti-downdraught chimney cowl.
- Rain ingress: add a rain cap with generous clearance.
- Wildlife & debris: a bird guard cowl with suitable mesh.
- Ember risk (thatch): a spark arrestor with fine stainless mesh.
- Stove liner termination: a liner pot-hanger cowl matched to liner size.
Quick links to speed selection
Use the Cowl Finder, scan The Cowl Guide, or go straight to the Shop if you already know what you need.
On complex sites, attach photos to your enquiry; the Chimney Cowl Safety Checklist suggests this for compatibility checks.
Measurements & Compatibility
Nothing slows a safe install like wrong dimensions. Measure chimney pot outside diameter (OD), confirm liner size (125/150/180/200 mm typical), and check the terminal’s free exit area against the flue cross-section. The Chimney Cowl Safety Checklist requires these three data points up-front.
| Item | Why it matters | Checklist prompt |
|---|---|---|
| Pot OD across rim | Ensures strap-and-band fits without sitting at the limits. | Record to nearest mm; photograph the rim. |
| Liner diameter | Spigot/pot-hanger must match to avoid leaks. | 125/150/180/200 mm are common; confirm before ordering. |
| Free exit area | Preserves draw and reduces soot at the terminal. | Ask vendor for the figure; compare to flue area. |
| Cap clearance | Prevents throttling; essential with rain caps and spark screens. | Visually verify a generous gap after fitting. |
| Material choice | Stainless outlasts mild steel in coastal/exposed sites. | Prefer stainless for body + mesh if near sea/salt roads. |
Measurements captured via the Chimney Cowl Safety Checklist reduce returns and call-backs.
Tools, Fixings & PPE
The right kit reduces time at height and prevents dropped objects. Stage essentials safely at eaves or on a scaffold lift. A short pre-start review against the Chimney Cowl Safety Checklist avoids forgetting critical items.
Tools & fixings
- Strap & band or bolt-down kits per product instructions.
- Pot-hanger or liner spigot sized to your flexible liner.
- Stainless fasteners and weather-resistant sealant.
- Tape measure, spanner/screwdriver, soft brush for meshes.
- Tool lanyards to prevent drops.
PPE & admin
- Footwear with grip; gloves; eye protection for drilling/grinding.
- Harness and restraint where required (e.g., boom MEWPs).
- RAMS copy with emergency/rescue plan and local authority permits.
- Phone/camera for before/after documentation.
Simple rule: if you cannot tether it, don’t carry it aloft. The Chimney Cowl Safety Checklist notes this as a stop/go criterion.
Step-By-Step Install Sequence
Follow this sequence and adapt details to the product you’re installing and the access you’ve chosen. Keep tasks short and controlled at height. The Chimney Cowl Safety Checklist encourages documenting each step with photos.
- Isolate & prepare. Confirm no live fires. For stoves, close air controls and let the system go cold. Pick the correct terminal: anti-downdraught, rain cap, bird guard, spark arrestor, or liner pot-hanger.
- Set access. Erect scaffold, position MEWP, or secure ladders/roof ladder. Establish exclusion zones and signage beneath.
- Inspect the stack. Check pot integrity, flaunching, leadwork, pointing, and overall stability. Defects first; install second.
- Measure & trial fit. Confirm pot OD and liner diameter; verify strap range and free exit area.
- Fit & secure. Strap evenly or bolt-down to instructions. Keep caps level, ensure generous clearance, and avoid clashing with adjacent pots.
- Final checks. Tug-test fixings, tidy the work area, remove loose items, and descend safely.
- Ground test. Conduct a clean, hot ignition and confirm steady draw; note any downdraught signs.
- Handover. Provide maintenance intervals and simple troubleshooting; record photos for your file.
Teams who tick off the Chimney Cowl Safety Checklist steps report fewer call-backs.
Maintenance Intervals & Logbook
Performance declines when meshes and caps accumulate soot and tar. Start clean and hot; smoke-lean lighting deposits less on the terminal. Use usage-based inspection and cleaning intervals. The Chimney Cowl Safety Checklist includes a simple table for this.
| Usage / site | Inspect | Clean | Notes |
|---|---|---|---|
| Primary home (regular burning) | Every 2–4 weeks in season | Every 4–8 weeks | Brush meshes gently; keep geometry true. |
| Occasional / weekend use | Monthly in season | Quarterly or at first soot bridging | Pre-winter inspection reduces mid-season call-outs. |
| Coastal / exposed sites | Every 2–4 weeks | Monthly + fresh-water rinse | Salt accelerates deposits; stainless performs best. |
Logbook entries aligned with the Chimney Cowl Safety Checklist satisfy insurers on thatched and rental properties.
Common Mistakes & How to Avoid Them
- Under-sizing free area: chokes draw and increases soot. Always compare terminal free area to flue area.
- Fine mesh + no cleaning plan: ember control demands routine maintenance—schedule it.
- Cracked pots/flaunching ignored: stop and repair before fitting any terminal.
- Low cap clearance: throttles the outlet and creates smoke spillage—keep gaps generous.
- Wrong fixing for exposure: use bolt-down where rims are damaged or wind loads are high.
Avoid these errors by keeping the Chimney Cowl Safety Checklist visible during the install.
When to Call a Professional
Some sites are better left to trained installers: chimney beyond the ridge on steep slate, fragile roofs, public footpaths directly beneath, or emergency storm damage. Use The Stove Guys to book vetted trades nationwide, or contact Hot Box® Stoves (Yorkshire) and Hot Box® Stoves Dundee (Scotland) for supply and install. The Chimney Cowl Safety Checklist flags these red-flag scenarios clearly.
Legal Duties, Roles & Documentation
Even for domestic work, the person organising or controlling the task must plan it, supervise it, and carry it out safely. The homeowner (domestic client) benefits from hiring competent installers who take on these duties. Trades should maintain documentation as the Chimney Cowl Safety Checklist outlines.
- RAMS: proportionate risk assessment and method statement for the access and the install.
- Equipment records: ladder inspections, scaffold handover certificates, MEWP pre-use checks.
- Competence evidence: relevant training cards, in-house briefings, and toolbox talks.
- Insurance: public liability and, where relevant, professional indemnity for advice/specification.
- Photos & sign-off: before/after images and a customer handover note with maintenance advice.
Public Interface, Traffic & Permits
Where work occurs over a public footway or near a carriageway, you may need permission, signage, cones, and barriers. Typical steps include, and the Chimney Cowl Safety Checklist puts them in order:
- Check if a pavement closure or parking suspension is required for scaffold/MEWP set-up.
- Use barriers and exclusion tape to keep the public out of drop zones.
- Time deliveries and waste removal when footfall is lowest.
- Brief the crew on public interaction: politeness, clear instructions, and rapid response if barriers move.
Competence, Training & Supervision
Competence blends training, experience, and supervision. Keep it practical with the Chimney Cowl Safety Checklist as a toolbox talk aid:
- Ladder users: trained in safe positioning, tie-offs, and three points of contact.
- Scaffold access: users briefed on access points, edge protection, and toe-board rules.
- MEWP operators: trained (e.g., IPAF) and familiarised with the specific model, with rescue plan agreed.
- Supervisor: empowered to stop work for weather, unsafe behaviour, or public interface issues.
Specifying Access in Quotes & RAMS
Clarity in quotation avoids dispute and improves safety. Use this mini-spec wording (adapt for your jobs) and attach it to the Chimney Cowl Safety Checklist page in your job pack:
SPEC – ACCESS & METHOD (EXAMPLE)
Access via [scaffold/MEWP/ladder+roof ladder] selected following site risk assessment. Exclusion zone with barriers and signage beneath work area. Tools tethered; materials staged at eaves/lift. Install [terminal type] to [pot OD] with [strap & band/bolt-down/pot-hanger]. Verify free exit area ≥ flue cross-section. Cap clearance checked. Final draw test from ground. Handover with maintenance advice and photo record.
Troubleshooting After Install
If issues arise post-install, work through this quick tree and annotate the Chimney Cowl Safety Checklist for your records:
Smoke blow-back / poor draw
- Check free exit area vs flue; cap clearance may be too tight.
- Assess wind exposure—an anti-downdraught model may be needed.
- Confirm no partial blockage in flue; arrange a sweep if in doubt.
Water ingress at terminal
- Fit or swap to a rain cap with adequate gap.
- Inspect flaunching and leadwork; water may be entering at the stack, not the terminal.
Birds/debris at terminal
- Install a bird guard with appropriate mesh size.
- Schedule seasonal inspections during nesting periods.
Soot bridging on mesh
- Increase cleaning frequency; review ignition methods and fuel moisture.
- Consider a design with larger free area if draw is marginal.
Seasonal Preparation & Storm Response
As seasons change, so do risks. Build simple habits and record them on the Chimney Cowl Safety Checklist so everyone follows the same rhythm:
- Autumn: pre-winter checks, mesh cleaning, and photos of terminal condition.
- Winter: wind/ice monitoring; pause work in adverse weather; daylight scheduling.
- Spring: post-storm inspections for loose pots or displaced terminals.
- Summer: maintenance on thatched sites; heat haze can hide hairline cracks—inspect closely.
Chimney Cowl Safety Checklist: Quick-Reference Prompts
- Chimney Cowl Safety Checklist: confirm access type (ladder, scaffold, MEWP) and create an exclusion zone.
- Chimney Cowl Safety Checklist: measure pot OD and match liner size before ordering.
- Chimney Cowl Safety Checklist: verify terminal free exit area ≥ flue cross-section.
- Chimney Cowl Safety Checklist: select anti-downdraught, rain cap, bird guard, spark arrestor, or pot-hanger by symptom.
- Chimney Cowl Safety Checklist: keep cap clearance generous to protect airflow.
- Chimney Cowl Safety Checklist: use stainless on coastal/exposed sites.
- Chimney Cowl Safety Checklist: tether tools and stage materials at eaves or on a lift.
- Chimney Cowl Safety Checklist: inspect pots, flaunching, and leadwork before fitting.
- Chimney Cowl Safety Checklist: photograph before/after and file with RAMS.
- Chimney Cowl Safety Checklist: schedule maintenance—2–4 week inspections in season.
- Chimney Cowl Safety Checklist: stop for high winds, ice, or lightning risk.
- Chimney Cowl Safety Checklist: call a pro for steep, fragile, or public-realm sites.
Print this page and keep the Chimney Cowl Safety Checklist in the van for toolbox talks.
Mini Case Studies (What Good Looks Like)
Urban terrace, busy pavement
Short goalpost scaffold with toe-boards over a shopfront. Exclusion zone and signage. Anti-downdraught terminal fitted with bolt-down plate due to chipped rim. Draw verified from ground. Zero public interface incidents; the Chimney Cowl Safety Checklist was signed by the supervisor.
Rural thatch, ember control
MEWP positioned on firm ground away from thatch. Spark arrestor with fine stainless mesh. Maintenance plan agreed: inspections every 2–4 weeks in season, insurer-friendly photo log linked to the Chimney Cowl Safety Checklist.
Steep slate, beyond ridge
Full scaffold with ridge-level platform and edge protection. Liner pot-hanger termination; cap clearance optimised. Client briefed on cleaning intervals. The Chimney Cowl Safety Checklist notes were included with the invoice pack.
Ready to act on the checklist?
Share this page so others can follow the Chimney Cowl Safety Checklist standard.
FAQs
Is a ladder ever enough for tasks in the Chimney Cowl Safety Checklist?
Yes—if the job is short-duration, low-risk, and the ladder is tied, footed, and used at the correct angle with three points of contact. Where chimneys sit high, beyond the ridge, or over fragile roofs/public areas, choose scaffold or a MEWP instead.
What’s the safest approach on a thatched property using the Chimney Cowl Safety Checklist?
Prioritise scaffold or MEWP for stable access, fit a stainless spark arrestor with fine mesh, and keep maintenance intervals short. Document inspections for your insurer.
How often should maintenance be carried out per the Chimney Cowl Safety Checklist?
Primary homes: inspect every 2–4 weeks in season and clean every 4–8 weeks; coastal sites need more frequent rinses. If you see soot bridging at the mesh or sluggish lighting, clean immediately.
Does the Chimney Cowl Safety Checklist cover liner terminations?
Yes—match pot-hanger or spigot size to the liner (125/150/180/200 mm typical) and verify free exit area and cap clearance after fitting.
Where can I get professional help to apply the Chimney Cowl Safety Checklist?
Use The Stove Guys to find vetted installers across the UK, or contact Hot Box® Stoves and Hot Box® Stoves Dundee for supply and install packages.
Downloadable PDF
Want a van-ready version? Download the printable Chimney Cowl Safety Checklist and keep it with your RAMS. It summarises access choices, product selection prompts, measurements, install sequence, and maintenance intervals on one page. Teams who carry the Chimney Cowl Safety Checklist report faster set-up and fewer errors.